Enjoying the good things in life!

Archive for December, 2024

Self-Care: At-Home Spa Day for the Holidays and into the New Year!

Are you struggling to get into the “Holiday Mood?” Sometimes the holiday can be quite overwhelming. There is soo much to do! It may seem that every hour is spoken for with work or a holiday task.

But stop! You need self-help!

Maybe you need some self-pampering!

Create a special holiday tradition for you and your loved one.

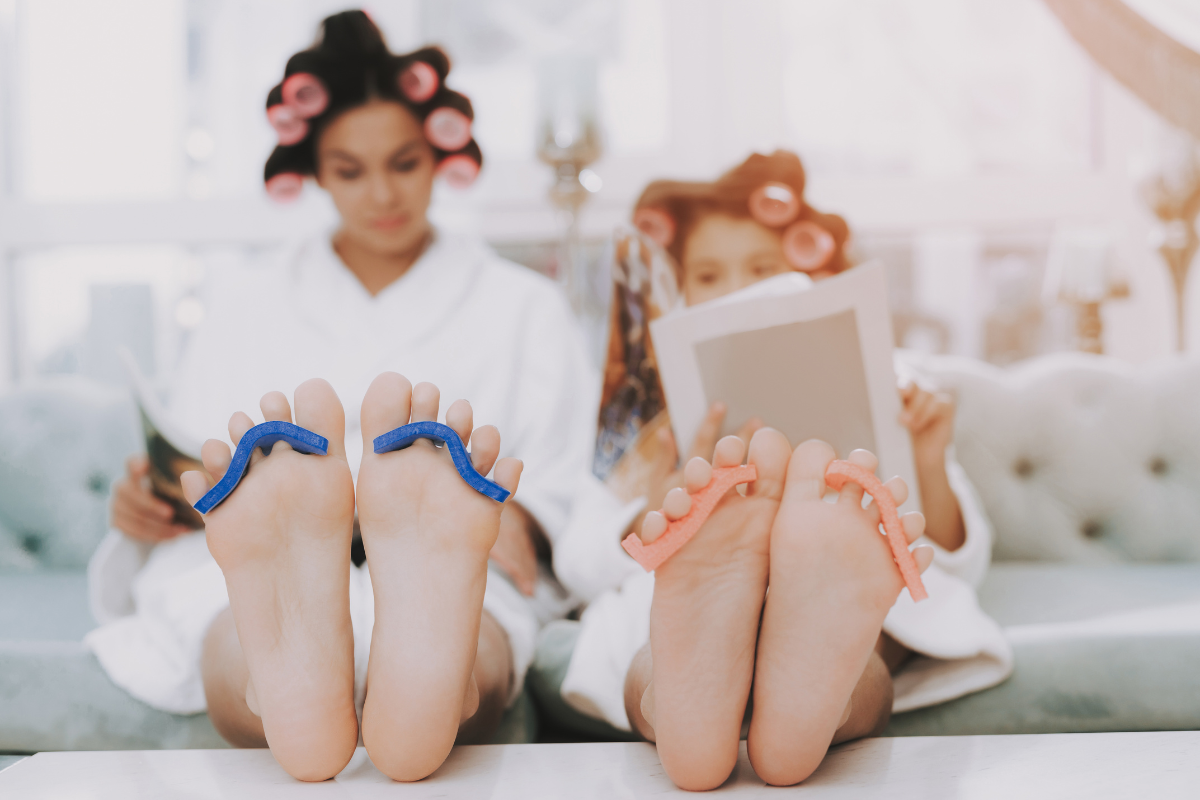
We’ve talked about how important it is to take care of yourself. You can do some easy at-home-spa treatments. Perhaps, you can enjoy them with a sister or daughter. Make it a special time, a holiday routine. Make this a holiday tradition.

Set a place. Gather nice towels. Maybe light a candle. (What’s your favorite scent? Peppermint?) Get some beverages together: Hot cocoa? Wine?

Pampering your skin: your hands and feet, is more than just cleanliness. It is investing in your own self-care. When our bodies are well taken care of, our emotional and mental well-being will improve also.

(Side Note: I am endorsing the Pomifera line of products. It can be daunting to find a good product line that does more than one thing. I don't like a bunch of bottles. And this is a pure Natural product! I like using Natural products and not chemicals.)

Assemble tools to use: Get your supplies together. Perhaps a tray or a pretty box? Keep them together so you can use them again throughout the year.

Gather: (Soap and water a small bowl for hands, a larger one if you are doing a pedicure for feet.) Fluffy towels, nail polish remover (without acetone if possible. Acetone removes nail polish easily, but it harmful to the nail bed.)

You might want to add a scrub brush for your busy nails. (I keep my tools in a small box and I’m always ready.)

Nail clippers, cuticle oil (Pomifera oil I’ll talk more of this later.); cuticle pusher; nail files; buffer; alcohol; cotton pads.

Base/top coat, nail polish;

Foot soak: perhaps some scented Epsom salts; foot exfoliator (can use a sugar scrub or Pomifera’s); foot stone for feet.

What product to use for nail care? Suggestion:

Gather good moisturizing products together. I recommend Pomifera, a natural line of products from the commonly called, Hedge Apple or Osage Orange Tree.

Does it look familiar? I bet you see it along country roads under the trees this time of year. It is not edible, but it’s seeds are where the benefits lay!

The extract of Maclura Pomifera (Osage Orange), the fruit, is rich in folklore dating back to early Native American culture. For centuries, it was used as a botanical source for treating medical ailments. The seeds were also used as a nutritional source of amino acids, proteins, carbohydrates, essential fatty acids and lipids. (You can roast the seeds, but the flesh is inedible.)

The light weight, Omega-6 rich, UV protective 100% Pure Pomifera Oil is isolated through cold pressing. It comes from the seeds of the Maclura Pomifera fruit.  This Vegan product is the rarest, most coveted oil for hair and skin care in the world.  It is nature’s unique mix of phytonutrients and bio-flavonoids that deliver the benefits of Pomifera Oil.  All of Pomifera’s products deliver moisture, shine, and body because of this luxurious oil.

(What I like about the Pomifera oil is it does not become oily on my face and hands. My skin soaks it right up to leave it feeling moisturized. I even use it as a bedtime moisturizer. No oil marks on my pillow!)

It really is quite easy to do an At-Home Spa treatment. I choose at at-home spa treatment as I can do it more often or when I feel I need it. I keep my materials together, so it is an easy procedure. Sometimes just a pedicure, and sometimes both!

Spa time: Manicures and Pedicures:

An at-home manicure is really quite simple. And it feels so good after! I’m starting with a manicure as this happens more often than a pedicure. But truth: Pedicure should be first if you are doing both.

Wash and dry hands and nails.

  1. Start with clean hands and nails. Wash your hands thoroughly. Remove any old nail polish with a acetone-free nail polish remover. Acetone can dry out your nails.
  2. I recommend Pomifera Body Butter Cleansing Bar to cleanse your hands and nails.
  3. Dry your hands thoroughly.

Pomifera Body Butter Cleansing Bar is a gentle and non-drying cleansing bar. It creates a rich and creamy lather. This lather leaves the skin clean and refreshed. Pomifera cleansing bar is infused with antioxidant-rich botanical oils to nourish and condition the skin. These oils also protect the skin’s natural moisture barrier. Pomifera cleansing bars are made in small batches. They are formulated with anti-aging Pomifera oil. This oil is a potent source of antioxidants, omega-6, and other bioactives.

  1. The next step is to Trim and Shape. You don’t want to trim and shape a soft nail. Soft nails will lend to peeling or cracking.
  2. If you are removing a lot of nail to make the nails similar, cut the sides first. Then, snip the middle to shape them up.
  3. If you are refining your shape, a simple filing will do. Glass files are the least likely to leave a jagged edge to your nail. Emery boards should be new and unused.

To shape the nails: file at a 45-degree angle. Move in the direction of your thumb in smooth, single strokes. Don’t go back and forth. Finish the nail with one stroke in the opposite direction from what you started with.

Going back and forth with an emery board actually weakens the nail edge and can lead to chipping or snags. (I recommend a clean/new emery board for manicures.) Always in one direction.

If you want square nails, carefully file the top. Shape the sides by gently filing upwards. For more rounded nails, follow the cure of your fingertips.

This is where I like to use an alcohol wipe to cleanse again, and detoxify. It removes filing shavings and cleanses at the same time.

  • Use a cuticle clipper to get rid of any hangnails.
  • Make certain your clipper is clean. You may want to rub with a cotton square dipped in alcohol.
  • ( I really try to keep my manicure items clean as you don’t want to be rubbing bacteria or dirt into your nail bed.)

Soaking, cuticles and exfoliating:

Soak and exfoliate calluses and push back cuticles. Here again, you can use Pomifera Oil, this time for a cuticle oil.

After pushing back cuticles, Now is the time for a hand-soak. Let your hands feel the warmth of the water.

What is the best thing to soak your hands in? Suggestions:

  1. Chamomile tea hand soak deeply hydrates:
    • Two cups of brewed chamomile tea
    • One tablespoon of honey
    • A small bowl of warm water. Mix well.
  2. Or try: Use milk + honey” for dry hands. Milk contains vitamin D, which is very good for your skin. It’s an anti-inflammatory and it also exfoliates. Honey is moisturizing as well as antibacterial.” DIY Milk and Honey Hand Soak: Mix 1 cup of warm milk with 2 tablespoons honey.
  3. Rice water hand soak locks in moisture.
  4. Rose water hand soak speeds healing.
  5. Oatmeal and lavender soak soothes irritation.
  6. Let them absorb the moisture. You are softening the skin to get ready for exfoliating. This makes it easier for your skin to shed dead cells and tissue.

After a bit of soaking, rub an exfoliator in and gently exfoliate your hands. You then will rinse off the exfoliator. You can use your facial exfoliator or a sugar scrub.

After exfoliating, massage your hands with a good moisturizer, paying attention to the cuticle area. (Remember your nail grows from the cuticle.)

I recommend: Pomifera Restore: Facial Exfoliant is formulated to gently exfoliate and improve skin texture. Walnut powder removes dead skin cells, preparing skin to better absorb nourishing ingredients, and reveals brighter, softer, more radiant skin. This face exfoliator is infused with antioxidant-rich Pomifera oil for added anti-aging benefits and works on your hands too!

Don’t forget to push back cuticles at this time, and to prepare the nail for painting.

If you plan to apply polish, remove any excess moisture from the nail with a small amount of rubbing alcohol. I like to do this before painting. I want to make certain that the nail area is bacteria free and dry.

At this time, I would place any nail utensil that you plan on using again, into some alcohol to sterilize. I let them soak until I’m all done. Then air dry and put away for next time. Throw out emery boards.

Buffing:

Lightly buff your nail surface to give them a natural shine. This can also help the nail polish adhere better.

Begin with the coarsest side of the buffer to remove rough patches. Next, use the medium side to smooth the nail surface. Finally, add shine with the softest side.

Move the buffer horizontally across the nail, to help smooth any roughness. Use the soft edge of the buffer. Polish any creases in your nail bed. Polish where the sides of the nail meet your skin.

Your hands should be clean and soft and you are ready to paint.

Nourishing time for your hands:

If you want natural nails, this is the time to shine with a nourishing serum. (Again, I recommend Pomifera Complete Moisturizer and Anti-Aging Serum.) Apply oil and massage into the nail. Your nails will absorb this nourishing oil. I also use this on my toe nails. Use the oil only if you are not Painting! Use the Oil only on hands if painting.

Pomifera anti-aging serum/oil is a potent source of antioxidants, omega-6, and bio-actives. It has been clinically tested to improve the appearance of age spots on your face. It also helps reduce deep and emerging wrinkles and fine lines of your face. This serum uses Pomifera oil and essential oils. These oils deliver impressive results. They come from simple ingredients that are kind to your skin and the planet. This lightweight serum can be used on its own to soften, smooth, and hydrate. You can also incorporate it into any of your existing routines to help you glow your best.

I have chosen Pomifera as my line of moisturizing for my hands. I drop oil onto my knuckles and in between the fingers. I really like how it feels. It works. Your hands are important. Use a good product line for not only your face, but your hands and body too. I rub the oil into my knees.

Nail Polish Time for your fingernails.

First a base coat. I prefer Orly base coat as it wears very well. (Orly started with being one of the few to be formaldehyde-free. Remember formaldehyde can soften the nail bed significantly over time. Not good.) Orly base coat can also be used as a top coat.

Once you are ready for your main colored nail polish, dip and wipe the sides of the brush. Do this on the inside of the bottle neck. This will prevent drips. This way you also have better control where the nail polish goes.

  1. Paint nails in three strokes. Start at the cuticle. Brush up once in the middle. Once on the right side. Once on the left side. Any more and your polish will become bumpy or too thick.
  2. Apply one coat.
  3. Allow to dry.
  4. Apply second coat. I try to paint the edges of my fingernails. It helps to prevent chipping.
  5. Finally the top coat. Orly has a base/top coat. Dab extra top coat at the edge of the nail where chips can occur. The top coat will seal the nail polish and prevent chipping. It will also help the polish last longer.
  6. Always, always use a base coat (so nail doesn’t absorb the polish) and a top coat (to seal the polish and last longer)

Enjoy! Your hands will love the pampering, and you will love the feeling!

For fingernails I would change my polish about every 10 days. Do it at a time when you can allow the nail to breathe without a sealing base/top coat. This is when I use the Pomifera oil and rub into the nail and cuticle and let it absorb. Your nails will shine!

Do you want a pedicure? It is suggested to start with a pedicure first and then do the manicure.

I chose to talk manicure first as most people apply nail polish more often on our fingernails than the toe-nails.

However, if I was doing both, I would start with the Pedicure first. Then the hands. You want your toe-nail polish nice and set before putting socks and/or shoes on. And who wants to mess up fingernail polish when polishing your toes?

I love a pedicure. I do one often. I do it often even in the winter. I try not to paint my toe nails in the winter. Who sees my toes? I cleanse and moisturize with showering. Let your nails recover from the nail polish/sealers. Let your nails breathe in the winter.

Pamper yourself. You are important.

Time to pamper our feet and toe nails.

As you did before with hands, start with clean feet.

  1. Remove any old nail polish. Try not to aggressively scrub. Let the nail polish remover set a bit, and then gently wipe off.
  2. Cut: File: and Buff.
    This is important to do before soaking your feet. Just as with your fingernails, the nails will soften in warm water. They become difficult to shape when wet or damp. If you trim when damp, you can cause more damage and tears. The nail will not cut smoothly.
  3. Clip with clean nail clippers. (wipe with alcohol) Clip to length desired. I choose to cut short. It is up to you on length.
  4. Then file the edges so they are smooth. A coarse nail file works.
  5. Buff the nail as you did with you manicure. This smooths out the nail bed.
  6. Last in the pedicure is the foot soak.

Now is the time for a good foot soak!

Gather your “chill time” favorites as this should take a while.
Wash your feet good! Be certain to get in between your toes.
Using a foot soak is so nice! (Great Christmas gift!) Some foot spas even massage your feet! Add 1/2 a cup of Epsom salts and sit for about thirty-to-forty-five minutes.

Take the time to relax. Enjoy that cup of tea. Sip the wine? Read a book. Disconnect from your phone. Enjoy the soak.

Cuticles can be a problem even for your feet. Massage a cuticle oil (Pomifera works great!) into the nail. Leave it soak in a bit. Push back the cuticle, gently with a cuticle pusher. Scrape any dead skin off the top of the nail.

Your feet love exfoliation too! A sugar scrub or a special foot scrub can work. Use something a bit more coarse than you would for your face. Scrub your entire leg including your knee cap. (Remember you can use Pomifera Exfoliant for face and legs and feet!)

Health benefits from a pedicure?

A good foot soak and massage can improve blood circulation and lower your blood pressure. It encourages better sleep and reduces feelings of anxiety and depression. It boosts energy levels and improves immune performance. It can reduce edema in pregnancy and speed recovery in foot injuries.

At home foot massage! You can do this to yourself!

Massage your feet while they are warm. Reflexology is the belief that putting pressure on certain areas of your feet can heal ailments elsewhere in your body. I do know it feels great!

With holidays: The foot massage of choice is for Anxiety: Curl your toes. Look for the depression just below the ball of your foot. Place the pad of your thumb in this depression. Hold on to the top of you foot with the other hand. Massage the area in small circles. Alternate this with holding the area firmly and pressing down.

To address low back pain, focus on your arches of the feet. Concentrate on the pressure points in your arches. Use a few drops of oil or lotion for lubrication. Moving from the heel to the toes, alternate moving your thumbs in a series of short strokes. You can press in with your thumbs. Then, “cat walk” along the arch like a cat making its bed.

Doesn’t hurt to try! I know your feet will feel good after.

Time to Break out the foot stone:

With softened skin, now is the time to use a foot stone. Work the soles of the feet and cracked heels. Focus on any area where there is rough skin.

Be careful not to be too zealous. You don’t want to make your heels sore. Gently break down the callused and dead skin to leave a healthy texture behind. Be good to your feet.

You may want to keep that foot stone in your shower to use weekly. Even in the winter, your heels can dry out. Don’t wait until they are Very rough. Always moisturize after.

Moisturizing is the best! Slather generous amounts of soothing moisturizing cream onto your feet and legs. Some recommend wrapping your leg and feet with Saran Wrap. This locks in moisture. It ensures your feet stay soft longer after you finish your pedicure. (You can leave the wrap on for a couple hours, or even overnight.) Once time is up, unwrap your feet and legs and massage extra cream into the skin.

Toe Painting Time!

Do you have a favorite color? Do you paint for the season? Whatever you choose, as you did with your fingernails, apply a Base Coat first.

Then two coats of color.

Finish with a Top Coat. Just as you did for your fingernails. The base coat protects the nail from absorbing the paint. The top coat seals the color and helps prevent chipping.

Be certain to let the nail polish dry completely before putting on socks or shoes, or slipping into bed.

Holiday De-stressing:

With the stress of the holiday season, take time out for yourself. Include your daughter or sister if you want. Make it a special part of the holiday season. You will be surprised at how calm you can feel after a good manicure and pedicure.

Holidays can have special moments. And sometimes those moments can be taking time for yourself. Teach your daughter or your sister or best friend, to take care of themselves too. Happy memories!

I know you will be happy if you did this!

Happy Holidays! Hugs! Mary.

https://wellness.maryjessen.com

References:

https://www.medicinenet.com/10_surprising_health_benefits_of_foot_spa/article.htm

https://voesh.com/blogs/news/the-power-of-pampering-6-health-benefits-of-regular-manicures-pedicures

https://www.womenshealthmag.com/beauty/a32176386/at-home-manicure

https://www.wikihow.life/Give-Yourself-a-Pedicure-Using-Salon-Techniques

https://www.goodhousekeeping.com/beauty/nails/a28170147/how-to-do-a-pedicure-tips/

https://www.elle.com/beauty/makeup-skin-care/tips/a28092/how-to-get-great-feet-at-home/

https://www.paulaschoice.com/expert-advice/skincare-advice/body-care/how-to-give-yourself-a-manicure-at-home.html

https://www.wikihow.life/Give-Yourself-a-Pedicure-Using-Salon-Techniques#aiinfo

  1. Kristin Pulaski. Salon Owner & Nail Specialist. Expert Interview. 19 May 2020.
  2. https://www.goodhousekeeping.com/beauty/nails/a28170147/how-to-do-a-pedicure-tips/
  3. https://www.elle.com/beauty/makeup-skin-care/tips/a28092/how-to-get-great-feet-at-home/
  4. https://m.youtube.com/watch?v=t1FM9LiJA0w&t=2m41s
  5. Kristin Pulaski. Salon Owner & Nail Specialist. Expert Interview. 19 May 2020.
  6. https://www.cosmopolitan.com/style-beauty/beauty/how-to/a5101/things-about-painting-your-nails-you-might-not-know/
  7. https://www.cosmopolitan.com/style-beauty/beauty/a27754061/how-to-pedicure-at-home/
  8. https://www.epa.gov/safepestcontrol/preventing-pedicure-foot-spa-infections
  9. https://www.goodhousekeeping.com/beauty/nails/a28170147/how-to-do-a-pedicure-tips

https://www.yahoo.com/lifestyle/5-hand-soaks-ahh-172836131.html

https://www.ouroilyhouse.com/hand-soak/

Healthy Cookie Recipes: Transform Your Favorites

C is for cookie, that’s good enough for me
Oh, cookie, cookie, cookie starts with C


Hey, C is for cookie, that’s good enough for me
C is for cookie, that’s good enough for me
Oh, cookie, cookie, cookie starts with C

Yum! Yum! Christmas Cookies! Yum! Yum!

Do you remember this character? He had a passion for cookies! Num! Num!

Can cookies be healthy?

A non-published poll, by a biased data collector says: Everyone loves a Cookie!

WHY ARE COOKIES SO BAD TO EAT?

Cookies are a favorite treat for kids and adults. They’re a perfect dessert to bake for dinner. It is also a welcome addition to a party.

I made Halloween cookies tonight! I confess it was a ready-made 12 cookies. They looked so festive to end our Halloween Chili.

Now if only they could be yummy, AND good for us!

Most traditional cookie recipes are brimming with calorie and sugar-heavy ingredients like butter, granulated sugar or chocolate.

With a few substitutions that you already have, you can turn that favorite recipe into a healthy cookie/dessert.

Many cookie recipes use refined white flour (which has less fiber than whole wheat). They also use butter (a saturated fat). Most add sugar (which can cause spikes in blood sugar).

SO HOW TO MAKE THE RECIPE HEALTHIER?

FIRST: Look at the flour in your recipe. Perhaps consider switching to a healthier flour.

Whole-Wheat Flour

Whole-wheat flour is much heartier than all-purpose flour and produces denser baked goods with a more robust flavor. Whole-wheat flour is milled from wheat berries with the nutritious bran and germ still intact. It is rich in fiber and essential micronutrients like iron, magnesium, and vitamin B6.

(The pictured Red Mill Whole Wheat flour can be found at Kroger’s.)

Whole-wheat has texture and flavor differences compared to all-purpose flour. It can’t always be used as a total replacement. You might first want to try as 1/2 and 1/2.

Two whole-grain flours that work well as substitutes are white whole-wheat and whole-wheat pastry flours. It is a lot more difficult to get light, fluffy and airy bread using a whole wheat flour. 

Whole wheat flour includes the bran and germ. These components act like little “shards” that cut the gluten strands while the dough is mixing. The cutting also occurs while it is resting. This leads to a bread that is more dense and less elastic. Your cookie will not spread like you want it to.

Using cake flour in cookies can give them a tender, delicate texture that’s perfect for light and soft cookies. You should consider blending cake flour with all-purpose flour. This will add structure while maintaining tenderness. This approach is especially useful if you’re aiming for a melt-in-your-mouth quality.

White whole-wheat is milled from white, hard wheat. It yields a lighter color and milder flavor. It still has all of the benefits of whole grains. You’re safe substituting up to 50% white whole-wheat for all-purpose flour in a recipe.

Whole-wheat pastry flour is milled from soft white wheat, producing a very fine flour with less gluten. While not ideal for all baked goods, these attributes produce feathery light pastries and perfectly tender pie crusts. Try substituting up to 25% whole-wheat pastry flour for the all-purpose flour in the recipe. You may need to increase the liquid if you use more.

(Pictured is a whole wheat chocolate chip cookie. Can you tell it is whole wheat? Your taster won’t know. And your family definitely won’t know. And you will be passing along a healthy recipe!)

When working with whole wheat flour, it can be a trial and error to start. My advice, start by cutting the white flour by 1/2 and see if you like the results. Even by cutting the white flour in half, you are adding nutrition to the cookie.

Whole wheat flour will add fiber and can make your cookie more satisfying.

OAT FLOUR: is probably the easiest flour to make at home. Ground oats will add sweetness and chewiness to your cookie, besides adding protein and fiber.

You can grind you own rolled oats in a food processor until they reach a flour-like consistency. Oat flour can replace up to 20% of wheat flour.

Start with wheat, and maybe try oat flour at a later batch of cookies.

EGGS: Did you know that bananas can replace an egg? 1 medium mashed banana will substitute for 1 medium egg.

The banana makes the texture lighter, chewier, plus sweeter. Adding the banana adds fiber and vitamins and minerals to your cookie!

(Suggestion: use a ripe banana, not a firm banana.)

SUGARS: Are you aware that adding pureed prunes will increase fiber and nutritional value? It also reduces added sugars, overall calories, and carbohydrates. This swap makes a good choice for you cookie without changing the overall taste and texture.

It is interesting that by adding prunes as a sweetener you are also adding nutrition for your bones. The antioxidants and anti-inflammatory properties of prunes help prevent bone loss. They also help to maintain healthy bone density and formation, according to clinical studies. The higher amounts of vitamin K in prunes help to improve bone health. All by adding prunes to your cookies! Wow!

You can also try to just cut your added sugar by 1/3 and see if you like the taste. Most likely you will not notice the difference.

BUTTER: You can replace about 1/2 of your butter with full-fat Greek yogurt. This will lessen the saturated fats of the cookie and still give it a soft, gooey texture.

SUGGESTION: Substitute at least 1/2 of the white flour for whole wheat. Use dark chocolate in place of milk chocolate. (Dark Chocolate is significantly healthier than milk chocolate.) Replace the butter with yogurt, canola oil, or olive oil. These kinds of substitutions adds fiber, nutrients, antioxidants, and healthy fats to the cookie treat.

NUTS: Unless there is a nut allergy, add nuts to many recipes.

The can be pecans, almonds, peanuts, cashews, pistachios, even chia seeds. This addition adds healthy fats, fiber, protein, and antioxidant vitamin E, beside a great taste and texture.

MAKE IT SMALLER: It is fun to cut out cookies at the holiday time. One other suggestion is make a smaller cookie. Two small cookies are still two cookies!

Smaller cookie = less sugars, carbs, and bad fats.

THOUGHTS:

Cookies are my favorite dessert. I try to limit my amounts to 2-3 cookies only after my main meal. I think my body is now just in the habit of thinking “cookie” at only supper.

Place on a plate just the right amount of cookies for each person. Portioning out the amount also teaches your children two is plenty. And always serve them AFTER the meal is complete. Children learn by example. Hopefully, serving cookies after a main meal is eaten will help them create healthy eating habits.

SNACK BARS: I consider most of the snack bars sold as “cookie-bars.” They contain a lot of sugars for a quick energy boost. We know what goes up, can come crashing down.

Learn to read the labels to compare. What cost the least may very well be the least nutritious. Nutrition can be costly. But it is worth it. Read the labels.

The best snack bar to consider:

Kind nut bars often contain a delicious nut and chocolate combinations and are easy to find at most grocery stores.  They offer many different flavors.

The first ingredient in these bars is always nuts. They also contain other whole food ingredients like dried fruit and seeds. They’re also gluten-free.

The added sugar content of these bars varies based on the flavor. Many options contain as low as 4 grams of added sugar. Kind products don’t contain artificial sweeteners

Kind nut bars are also high in fiber, with several flavors providing 25% of the daily recommended fiber intake.

If you are looking for a nutritious snack: go for nuts and fruit. A handful of nuts if always a good snack.

CHOOSING CHRISTMAS COOKIES: When you are deciding what cookies to bake this year, consider making easy substitutions to the recipe. This will help you make your Christmas Cookie healthy.

Or you can try:

PROTEIN COOKIES:

PROTEIN SUGAR COOKIES: makes 12 cookies

2/3 cup vanilla protein powder (Shaklee Vanilla Life Shake)
3/4 cup oat flour or wheat flour or all-purpose flour
1/4 cup Stevia
1/4 tsp baking soda
2 Tbsp. creamy peanut butter or almond butter
2 Tbsp Unsalted butter (Can add 1/4 tsp of salt if needed)
1 large egg white
1 Tbsp maple syrup
1/2 tsp. Pure Vanilla Extract

Heat oven to 350 degrees.

Whisk dry ingredients in a small bowl.
Add wet ingredients and mix until dough is formed.
Line a baking sheet with parchment paper or lightly spray.
Using a Tablespoon measure, measure out dough and shape into balls. Place 2 inches apart.
Press balls flat to roughly 1/2 inch thick using back of a spoon or your hand.

Bake 8-10 minutes until edges are firm, but center is still soft. Cookies will set upon cooling.

Suggestion: flatten a bit more fresh out of the oven to make a flatter cookie.

While cookies cool,

Combine 1/2 cup powdered sugar
1 Tbsp. cornstarch or tapicoa starch
2 Tbsp unsweetend milk
1 Tbsp unsalted butter (melted)
Mix all together and spread over Cookies. Can decorate with sprinkles if desired.

PROTEIN CHOCOLATE CHIP COOKIES or a nut cookie, a cranberry cookie (adding oatmeal is not advised.)

Makes 18 cookies

4 eggs
1 – 1/3 cup unsalted peanut butter or almond butter
1 cup granulated sugar (white, brown, coconut, etc.)
2 tsp. Pure vanilla extract
1 Cup Shaklee Chocolate Life Shake (or Cafe Latte Shake)
1 tsp baking soda
1/2 tsp of salt (omit if peanut butter was salted)
1 cup chocolate chips (Here you can add walnuts, or pecans, cranberries, raisins, etc.) Can add cocoa to make the cookies chocolatier!

ADDING Oatmeal is not Advised.

Preheat oven 350 degrees.

Line baking sheet with parchment paper.

Whisk together eggs, peanut butter, sugar and vanilla until smooth.
Fold in protein powders, baking soda and salt. It will be thick!
Fold in chocolate chips or nuts, etc.
Using a 2 Tbsp scoop, scoop dough and roll into balls. Flatten.
They will not spread much while baking, so form into roughly the shape you want the cookies to be (suggestion: sticks?)
Bake 8-12 minutes (suggested check after 10 minutes) depending on preference of browning. They will firm up slightly upon cooling.

Let cool on baking sheet.

SUGGESTIONS:

The above can be started dough for all different flavors. Shaklee offers Life Shake in flavors: Strawberry, Chocolate and Vanilla Protein Shakes. You can add crushed candy (of course this will become a sweeter cookie, but it will be fun!) Roll the balls in green or red sugars. Have fun decorating!

Cookies can be healthy and not only sugar.

Do share your recipe! Hugs! Mary


https://wellness.maryjessen.com

References:

ttps://www.foodnetwork.com/recipes/photos/healthy-cookies

https://www.eatingwell.com/article/7595251/the-healthiest-flours-to-use/

https://eatwithclarity.com/chocolate-chip-protein-cookies/

https://nutritionistmom.com/blogs/blog/frosted-protein-sugar-cookies

https://www.usenourish.com/blog/healthiest-snack-bars

Delicious Homemade Hot Chocolate Recipe and the history of the cocoa bean

Homemade Hot Chocolate in a sweet mug: “You sweet, creamy heavenly thing! I want to spend every winter evening curled up with you. I want my hands are wrapped around a warm mug of hot chocolate. I will watch steam rise from the cup. The whipped cream on top slowly softens. It melts into the creamy dark brown liquid. Slowly my body starts to melt into that cup. I feel the tension ease away.”

What a great tension/stress reliever! I always try to have some “idea” in the back of my head for a secret tension tamer. Hot cocoa hits the spot!

The joys of a cup of Hot Cocoa.

Hot Cocoa for ONE:

2 tsp of cocoa powder, 2 Tbsp of sugar. Heat 1 1/4 cup of milk until warm/hot. Pour a little of the hot milk just enough to cover the powdered mixture. Dissolve the cocoa and sugar with a spoon or small whisk. Once you have a “chocolatey” base, add 1/4 tsp of vanilla. Pour the rest of the milk into the cup, stir and Enjoy!

I want to know more about this wonderful flavor! Where did the cocoa come from? How did it get from field into my cup?

Origins of the cocoa bean:

The cocoa bean is really a fermented seed of the Theobroma cacao, the cacao tree. From the fermented seed, cocoa solids (nonfat substances) and cocoa butter, (a fat substance) are extracted.

Today the cacao tree grows in a limited area of West Africa, and Indonesia. West Africa produces 81% of the world’s crop. There are three varieties: Forastero, Trinitario and Criollo (in order as pictured); Foraster is the most widely used variety.

What it takes to produce one pound of chocolate:

The cocoa tree takes five years of growth to produce it’s fruit, the cocoa pod. The tree has a typical lifespan of 100 years!

To produce 1 pound of cocoa, you need about 400 dried cocoa beans. A typical cocoa pod contains 30-40 beans. Cocoa pods weigh about 14 oz each. The yield is about 9-10% of the total weight. One person can separate the beans from about 2000 pods per day.

The beans are roasted, cracked, and de-shelled, resulting in what is called nibs. These nibs are then ground into a thick paste known as chocolate liquor or cocoa paste.

A cocoa pod, picked by hand, is 6.7-7.9 inches long. It varies in colors: green, red, or purple as they mature. Once mature their color is yellow or orange, particularly in the creases of the pods.

These pods grow directly from the trunk of the tree or a large branch. The pods do not ripen at the same time, so harvesting needs to be done periodically throughout the year. Ripeness is a judgment of color of the pod. They are harvested with a curved knife or a long pole.

Cocoa pods have to be harvested carefully to avoid damaging the junction where the stem is attached to the tree. This is where future flowers and pods will emerge. (It seems to be quite labor intensive.)

It gets better! The harvested pods are opened with Machetes! to expose the bean.

Oh my!

The pulp and bean are harvested, and the rind is discarded. This is an essential process in which the beans are laid out in bins or grates. They “sweat” as the thick pulp liquifies during fermentation. If sweating is interrupted, the resulting cocoa will be ruined. If underdone, the seed’s flavor is like a raw potato and becomes susceptible to mildew. Some cocoa countries distill alcoholic spirits with the liquefied pulp. (Think Aztecs with their potent cocoa drink.)

Processing:

Cocoa butter and Cocoa powder are separated using a hydraulic press or the “Broma process.”

Natural cocoa utilizes the Broma process. This involves hanging bags of roasted cocoa beans in a very warm room, above the melting point of cocoa butter. This allows the butter to drip off the beans. It is then collected. Natural cocoa powder produced with the Broma process retains the natural pH level.

Once the cocoa butter has dripped off, the beans are put out to dry.

Treating cocoa with an alkali produces Dutch process cocoa. Dutch processed cocoa, called Dutch cocoa, or alkalized cocoa, is cocoa solids that have been treated with an alkalizing agent. This treatment reduces the natural acidity of cocoa. It gives it a less bitter taste and a darker color compared to “natural cocoa” extracted with the Broma process. It forms the basis for much of modern chocolate, and is used in ice cream, hot chocolate, and baking.

To all the bakers reading this:

(Illustrated is the difference in color due to the processing. Dutch cocoa is on the left, and natural cocoa is on the right.)

For you bakers to know: Dutch processed cocoa has a neutral pH. It is not acidic like natural cocoa. In recipes using sodium bicarbonate (baking soda), the cocoa’s acidity is necessary to activate the leavening agent. An acid must be added to the recipe. One can add cream of tartar or use buttermilk instead of fresh milk.

There is no need to add acidity when using baking powder in recipes with Dutch processed cocoa. Baking soda is not used for leavening in these recipes.

Dutching greatly reduces the levels of certain phytochemicals in cocoa.

Phytochemicals:

(Medium close up image of David Kebu Jnr holding cocoa beans drying in the sun.)

Phytochemicals are chemicals from plants that may affect health, but are not essential nutrients.

The flavonol-rich chocolate and cocoa products may have a small blood pressure lowering effect. The beans also contain theobromine, and a small amount of caffeine.

Hot cocoa has nutrients!

“It is the ‘theobromine of the cocoa seed that has the affect on blood pressure. Theobromine is an alkaloid. It naturally lowers blood pressure. This, in turn, decreases the risk of cardiovascular disease. There’s also some evidence theobromine may reduce “bad” cholesterol and improve “good” cholesterol. Additionally, the substance may improve blood flow throughout the body, further supporting the heart.” (tcho.com/blog)

Theobromine can also stimulate similarly to a cannabis high, but at a much lower level. It thereby produces a relaxing effect and relieves stress. (I knew there was a reason to feel so good after a cup of hot cocoa!)

Pharmacology: “theobromine is also used as a vasodilator, a diuretic, and heart stimulant. And similar to caffeine, it may also be useful in management of fatigue.”1

Caffeine in cocoa

Theobromine is also present in small amount in tea and coffee.

Caffeine is highly water soluble, peaks in the blood 30–40 minutes after ingestion, and has a half-life of 2.5–5 hours.

Theobromine is fat soluble. It attains peak blood concentrations 2–3 hours after ingestion. It has an estimated half-life of 7 –12 hours.

Some people are able to drink hot cocoa before bedtime with no sleep issues. I suggest you try it first on a night where sleep may be important.

Caffeine in cocoa:

Dutch cocoa contains 3 times less caffeine:

  • 100 grams unsweetened cocoa powder processed with alkali contains 78 mg. (Dutch proccessed cocoa)
  • 100 grams unsweetened cocoa powder without alkali contains 230 mg. (natural cocoa with Broma process)
Cocoa has some nutrients in the bean! Coffee not so much.

Cocoa on the international market.

There are international and national initiatives to support cocoa production. Many nations working together for a common good.

These international and national initiatives aim to support sustainable cocoa production. This group of initiatives includes the International Cocoa Organization (ICCO), Swiss Platform for Sustainable Cocoa (SWISSCO). It also includes the German initiative on Sustainable Cocoa (GISCO), and Belgium’s Beyond Chocolate. Countries where chocolate is significant.

These initiatives gather to support sustainability of cocoa production. Protection of the environment. Deforestation. Sustainability of Cocoa trees. A watch of pesticides and fungicides on exports/imports. And many more environmental themes.

One of the biggest problems in the cocoa industry is the use of child labor. This is a significant problem in West Africa. With the work of the partnering governments, child labor is decreasing. (The US is also involved in this issue.)2

Cocoa is a big contributor to many West African economies.

Since 2008, the demand for cocoa has risen steadily at over 3% annually.

In 2020, world production of cocoa beans was 5.8 million tonnes, led by Ivory Coast with 38% of the total. Secondary producers were Ghana and Indonesia (each with about 14%).

We all love cocoa! Not only is it sweet to drink, but it’s also healthy!

The Difference Between Hot Chocolate and Hot Cocoa

There’s nothing like a mug of hot chocolate topped with whipped cream or plump marshmallows on a winter day. Or wait, of should it be hot cocoa? Aren’t they the same thing?

What is the difference other than color? Is there a difference in taste?

(illustration on the differences: note the different colors.)

Are Hot Chocolate and Hot Cocoa the Same Thing?

While both names are attached to a delicious, “chocolaty” beverage, hot chocolate and hot cocoa are, in fact, different. 

Hot cocoa is made from cocoa powder, sugar, and milk. It’s sweet thanks to the sugar and is light in texture. 

On the other hand, hot chocolate is finely chopped chocolate mixed with hot milk. It’s super-rich and thick in consistency compared to hot cocoa, which is a bit thinner. (the sweet is in the chopped chocolate bits). And no it’s not the same as “hot chocolate milk”- which is warming up cold chocolate milk. Also delicious!

Healthy Hot Chocolate Ingredient Swaps

Although it is a treat, you can make it healthier without sacrificing taste.

Sugar
Swap the sugar for ¼ cup of honey, maple syrup, or ½ cup of coconut palm sugar.

Dairy-free milk
Swap the regular milk with your favorite milk alternative to make this dairy-free. I’ve tried this recipe with oat, soy, rice, and almond milk, and it always turns out great.

Dutch Process vs. Unsweetened Cocoa Powder

Hot cocoa made with unsweetened cocoa powder will have a richer flavor. Dutch processed tastes flatter. It usually needs to be offset with more sugar and full-fat milk.

It all depends on your taste. Sweet and creamy, or rich and thicker?

Needless, to say, whilst the two are subtly different, one thing remains the same. They both taste wonderful.

Time to make a cup of Hot Cocoa!

Recipes Please!!

Homemade Hot Chocolate for one:

Place 1 cups of milk, 1 Tbsp of unsweetened cocoa powder, 1 Tbsp. granulated sugar, 2 Tbsp of chocolate chips, and last: 1-2 DROPS of pure vanilla extract. Heat milk, cocoa powder, and sugar in a small sauce pan. Heat on med/low heat, whisking frequently, until warm. (but not boiling!) Add chocolate chips and whisk constantly until chips are melted. Distribute evenly into the milk. Whisk in the pure vanilla extract, and Enjoy!

Adding vanilla at the very end, gives a nice vanilla flavor to the cup.3

Healthy Protein Hot Chocolate:

If you are craving chocolate and want more than just a warm cup of milk, try adding protein powder. I suggest Shaklee’s Life Shake, addition to your mix. You can easily make that “time-out” time for a meal!

I am torn between Rich Chocolate Life Shake, Cafe Latte Life Shake and the New Salted Caramel Life Shake. Shaklee offers Soy, Dairy-free, Vegan, Gluten-free, and Kosher in many flavors.

Their flavors are smooth and rich. The new Salted Caramel Life Shake can be combined with the Rich Chocolate flavor. You are getting a lot of nutrition, including protein, in a warm, soothing, cup of steamy hot cocoa.

(A purchase of Salted Caramel Life Shake this Fall sends a $5 donation to Baby2Baby, an organization that provides basic essentials to children living in poverty across the US.)

All shakes include 20 g Ultra-pure, non-GMO protein. They have precise ratios of all 9 essential amino acids. This supports energy and satiety. 24 Essential vitamins and minerals to support heart, brain, immune, and overall health. 6 g Dietary fiber and a proprietary prebiotic from an ancient grains blend to support digestive health and regularity. Our new, low-glycemic sweetener system, Reb M + 5 g natural sugar cane. The new Life Shake is Powered by Leucine® to help build lean muscle, burn fat, and support metabolism.†

Plant based proteins are made with Pea Protein, L-leucine, Organic Chia Seed Protein, and Organic Pumpkin Seed Protein. They include pea protein, organic chia seed protein, and organic pumpkin seed protein. Pea protein, chia seeds, and pumpkin seeds are excellent sources of protein and fiber. They provide essential nutrients that support overall health and wellness.

Hot cocoa additives to give your cup a unique taste:

Hot cocoa can be the base for many different flavors. You can choose a different extract, but be certain it is a pure and not imitation. Adding your extract last will enhance the extract’s flavor.

Add spices! (Cinnamon and a pinch of cayenne pepper will turn your cocoa into Mexican Hot Cocoa!) Don’t be afraid of Pumpkin pie spices.

Mix in nutella for a hazelnut flavor. Swirl caramel into the milk.

You can make your hot cocoa with a strawberry base: Puree fresh strawberries first and add to the milk. Oh! Chocoalate and strawberries!

Add a splash of bourbon, whiskey or a liqueur, or Bailey’s for an adult after-dinner drink!

To be extra fancy: rim your cup with chocolate syrup, caramel syrup of another other sticky sweet syrup. Coat the stickiness with crushed peppermint candies, cookies or even toasted coconut. Add a bit of sprinkles for color!

Don’t forget to share!

Cocoa is good for All Ages! (Just be careful of the temperature.)

My favorite cup of hot cocoa is to top with real Whipped Cream!

Sit down, sit back.

Take a mini-time out and Enjoy!

References

https://wellness.maryjessen.com

References:

  1. https://tcho.com/blogs/news/8-health-benefits-of-the-theobromine-found-in-chocolate# ↩︎
  2. https://en.wikipedia.org/wiki/Cocoa_bean ↩︎
  3. https://www.laurafuentes.com/how-to-make-homemade-hot-cocoa/ ↩︎

https://en.wikipedia.org/wiki/Dutch_process_cocoa

https://www.britannica.com/topic/cocoa-food

https://pmc.ncbi.nlm.nih.gov/articles/PMC3672386